


I spent most of the winter trying to survive blizzards and ripping out the remainder of the carpet from my dated 1992 home. And finally, after months of working on projects around the house, I’m starting to enjoy some of the results of my labor. My primary bedroom – and the other bedrooms for that matter – are done! However, in true Orlando fashion, I did ANOTHER makeover on my bedroom after taking these photos. Right after I figured out how to make my existing furniture work, I was approached by furniture maker Jonathan Louis to do a collaboration about their brand new bedroom furniture (side note: it’s AMAZING). So if you follow me on Instagram you might notice things already look a little different. But, I really loved this version of the room so I’m excited to share it with you! (You can see the latest updates on a sister post I did over on my blog today!).

 remember this??
I made the decision to move to the woods in the height of covid when I really had no idea when things would get better. When I moved, we still had no idea when the vaccines would be ready and if they would even make a difference. As things open up, I actually still can’t get over what a miracle the vaccines have been. We could still be waiting for them to arrive with no end to the pandemic in sight. CAN YOU IMAGINE FOUR YEARS OF THAT (which is what some scientists were estimating)? The rest of the world, for the most part, is still waiting. We are so lucky and I’ve just been feeling so grateful for the vaccines and science.
I’ve lived in LA for 14 years and I’ve never really felt welcome to the table in terms of the real estate market as someone without the help of family money or a rich husband (or wife). I moved back to California because I love houses and space, so I wasn’t interested in buying an apartment or condo. Also, after living in a condo for four years and seeing the headaches they can bring in terms of no one wanting to spend money to keep the common spaces nice, I decided that life wasn’t for me. So I moved to the woods and boy has it been a RIDE.
For the most part, I love living in Fish Camp, my idyllic town at the southern gate to Yosemite. I have really wonderful neighbors – all of whom have been friendly and Gay affirming. I wake up every day and see trees out my window, hear birds chirping. It has been a really wonderful escape from the weirdness of city life during covid. However, now that things are starting to get back to “normal,” I’m definitely ready to stop being a Forest Troll. I’m ready to spend time with friends again, to be able to grab a salad when I want to, and OH MY GOD to order from Postmates. It’s really hard to be lazy and disgusting when you live in the woods and have to drive into town and buy groceries AND THEN COOK THEM ALL BY YOURSELF. I love country living and I’m glad I’ll be able to split my time between the woods and LA, but, Girl, I am ready to get back to the hustle and bustle.
 from: orlando’s diy guest room reveal
Now that I’ve told you my entire life story I can get to the topic at hand: MY BEDROOM! One of my favorite things to do lately is to look at the before photos of what the house looked like when I bought it and then look at these “after” shots. When I moved in, the room had blue carpeting (so did the entire house). Eventually, I’m planning on installing some pretty wide plank wood flooring in here, but for the time being I’ve been having a good time experimenting with using semigloss wall paint on the floors. Yes, they make paint specifically for floors and yes that probably would have been a better option but A) I’m not planning on keeping the floors like this for long and B) It was a lot easier to just grab semigloss paint at my local hardware store (which didn’t have interior floor paint).

I have been getting a TON of questions from people about the floors so I want to spend some time chatting about them. A lot of people are asking me if I’m pleased with them and would recommend them to others. The answer to both those questions is YES. Visually speaking, I hated the carpet. Yes, it was SUPER CUSHY on the toes but it made me want to rip my eyeballs out. I’m not anti-carpet in any way, I love a nice carpet in a bedroom. But this particular color really dated the house and made it impossible for me to give it any sense of style. Additionally, it made all my 80s/deco style furniture look retro (in a bad way) instead of chic. Ripping out the carpet was time-consuming and led to my fingers bleeding profusely for weeks. Cutting and removing the carpet was easy, it was removing the millions of staples that proved to be the real challenge. The repetitive action of staple removal was what led to me having bloody stumps for fingers. And there was 3000 square feet of it. It was not a pretty picture and by the time I was done I hated the world.

There are a few downsides to ripping out your carpet and painting your floor and I want you to be fully aware of them should you ever want to do this. Firstly, my sub-floor is pretty rough. There’s lots of gauges in it, lots of random blobs of plaster, some splinters. Painting the floor smooths this out somewhat but the look is definitely rustic. I really like the character it brings but that’s not for everyone. Also, if your home was built and then immediately carpeted, you’ll probably notice a lot of gaps between the wall and floors. I haven’t dealt with that in my house yet and it kind of adds to the rustic look but again, it might drive you crazy. If I keep the floors like this for more than a year I’ll probably add some trim pieces where the floor meets the walls to fill those gaps.
Finally, a painted floor is sensitive and a little hard to clean. I’m kind of waiting for my floors to get scuffed up so they have more character and age, but for a perfectionist little dings in the paint might be a complete dealbreaker. Overall, I am really happy with my painted floors. I think this is a really elegant solution for someone who might not have the budget for adding in wood flooring OR someone who wants a more artistic, rustic look.

Bed | Nightstand | Table Lamps | Marble Tray (on nightstand) | White Vase (no longer available) | Ceramic Bell | Bell Hanger (DIY)
I had this beautiful patterned bed from a previous collaboration with The Inside and I still love the style and think the bed was a great value. However, after having a patterned bed for a few years I was excited to get a solid upholstered bed again. Basically, something that I didn’t think about is that it’s really fun to have a patterned bed but it really limits your bedding and pillow options – you have to always choose simple solids or risk a disgusting pattern combo. Pattern mixing is hard. And sometimes IMPOSSIBLE.

The cute little waterfall bench was kind of a design fail on my part. I LOVE the bench and think it’s adorable but I didn’t check measurements before ordering and thought it would be much longer. As always, my solution was to add a basket. More and more these days I’m realizing there aren’t many design problems a basket can’t solve. Shelving looks boring and cold? ADD A BASKET! Nowhere to put your cashmere blanket collection? ADD A BASKET! Need a place to hide all your kids’ toys and garbage? ADD A BASKET! I’ve since moved this cute little bench into my living room, where its scale is much more at home but it served me well for months with the help of Basket.

One of the biggest style issues in my house was the lighting. Basically, every room in this house had ugly lighting or a gross disgusting fan in it. It’s hard to tell from pictures, but the ceiling in my bedroom is a bit odd, which makes lighting placement a challenge. Previously, a boob light was plopped on one side of the room on a slant. That felt awkward to me so I decided to center the globe on the peak of the room (which isn’t centered). Eventually what I want to do in here is simplify the roofline so it’s just one slope up. The complexity of the architecture of the ceiling looks badly designed and like an afterthought and it makes me furious on a daily basis.
I’ve already replaced the big paper globe with a more formal fixture from Lamps Plus, but I had a few of these around the house for the first few months living here and they were a great, inexpensive solution for getting the ugly lighting out of here. Unfortunately, I’m a huge Isamu Noguchi fan and once you look at his iconic light sculpture globes the cheap party versions look like cheap party versions. That being said, I think these paper lanterns are a really warm, pretty solution if you’re looking to bring in another material and not spend a ton. And this phase of my makeover process is all about being economical.
Throw Pillow Fabric | Duvet Cover | Blanket (no longer available) | Sheets (from Target no longer available)

The bedding is a combo of Target (their striped flannel sheets were one of my faves but I think they stopped making them) and Parachute. Every morning I fastidiously make my bed and then two seconds later Satie (my sweet and tiny puppy) jumps on it and messes it up. I think she has as much of a bedding fetish as I do because she’s constantly luxuriating on the beds in every room of this house, fluffing the pillows until they’re just so, and napping all day like an actual angel. I actually don’t understand how my dog is so fit and muscly all she does is sleep all day. It’s not fair!

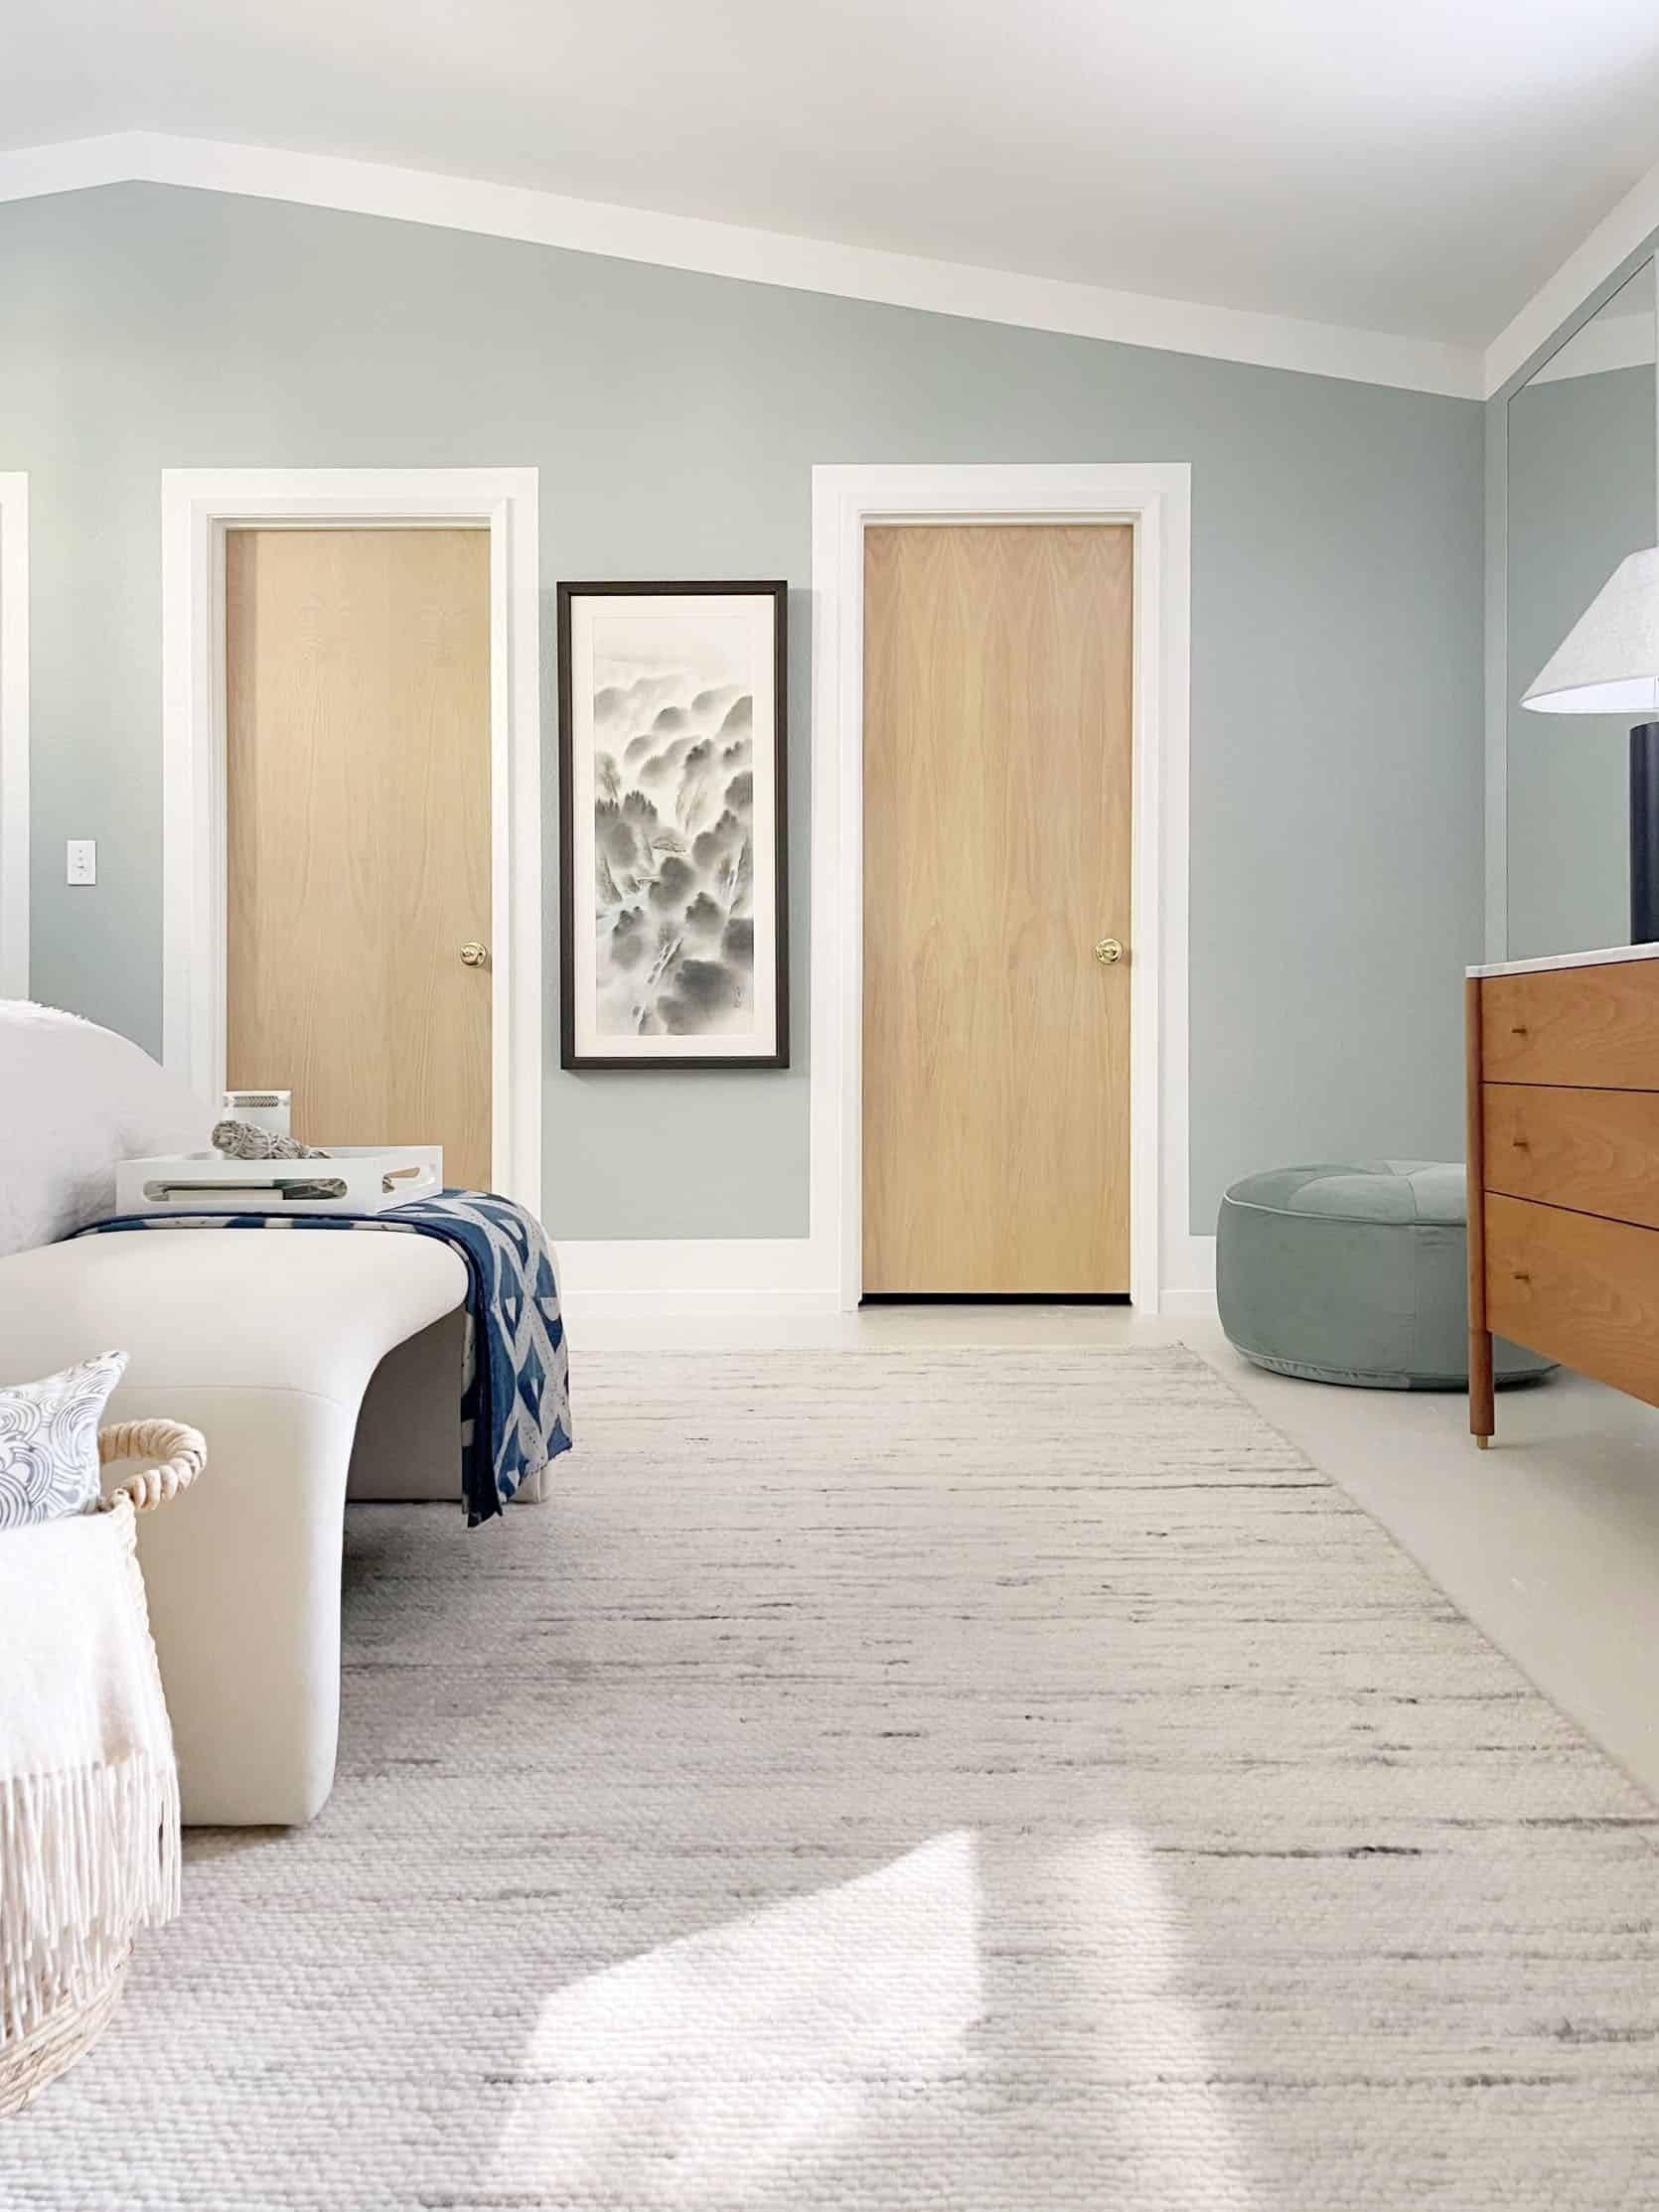
The art is from Minted and while it seems a little random to have a seascape in the middle of the woods, I had a reason for choosing it. As you know by now I grew up in Yosemite and it always drove me nut that everyone had Yosemite art in their houses. It was like HELLO YOU COULD JUST LOOK OUT THE WINDOW. So I wanted something that had a soothing landscape vibe but wasn’t a representational painting of Half Dome or something. This diptych by Caryn Owen worked perfectly with the color palette in the room and had the calming vibe I wanted.

Dresser | Table Lamps | Speaker | Art | Wall Color | Chair (similar)
Speaking of calming vibe, the paint! The color is “Olive Branch” by True Value. There’s a True Value hardware store in Oakhurst, about twenty minutes from me, and I swear I go there every single day. The people are really friendly and helpful and they randomly have a ton of cute home accessories (I found some great cocktail tables there last week!). In order to give the rooms in my house a bit more formality, I decided to add simulated crown moulding and extended baseboards. I did this for a few reasons. Firstly, most homes aren’t built perfectly so the line where the wall meets the ceiling is usually a zig-zagging mess. So if you paint along that line you’re just accentuating the imperfections in the architecture.
To create the border around the top part of the wall, I measured 5” down from the ceiling and taped it off. I also added a 5” border around the pre-existing PUNY baseboards to make them look chunkier and more substantial. I’m not gonna lie, adding these borders in definitely makes painting more tedious. But now that I’ve painted three rooms in my house this way I have gotten better and more efficient at it. I’m a perfectionist when it comes to painting so while I’m kind of annoyed I haven’t been able to find a painter up here to help me and free me up for other work, I’m glad the job is getting done perfectly.
This bordering style of painting is definitely something I’d recommend to anyone who has a house like mine – kind of a boring box with no architectural details to give it flavor. The borders around the ceiling, windows, and doors accentuates the architecture the way trim would and just gives the space a sense of importance. It’s a hack I plan on doing everywhere in the house because I love the elegance it adds.
Whoever built this house had a really great sense for wood tone. I love the natural color of the interior doors. I plan on replacing them with more traditional shaker-style doors but I will definitely be taking these to a salvage place because they’re too pretty to just throw away.
All in all, I love the way this version of my bedroom looks. I’m excited to show you the changes I’ve made because they’re definitely an upgrade (head over to my blog to see!). But this phase of my house design, and the content I’m making about it, is really more about what you can do to improve your house without spending a ton of money. And one of the ways to save is to use preexisting pieces. FOLLOW ALONG WHY DON’T YOU AND WATCH ME CONSTANTLY MAKEOVER THIS ROOM OVER AND OVER AND OVER FOR THE REST OF MY LIFE.
Goodbye!
The post Orlando’s Primary Bedroom Reveal!! (And His Super Simple Paint Trick That Will Add “Architecture” To Any Space) appeared first on Emily Henderson.
Read more: stylebyemilyhenderson.com